Image tutorial
Make a Nine-Grid Image for WeChat Moments or Xiaohongshu
Create one large image, detect its divider lines and download nine numbered tiles for a WeChat photo grid or a Xiaohongshu tutorial.
On this page
A large photo spread across nine WeChat Moments tiles and a step-by-step Xiaohongshu tutorial can start the same way: make one large image, then split it into nine smaller images. The image splitter runs for free in your browser.
Step 1: prepare the large image
You can use either:
- Your own image: a poster, a tall graphic or a photo you want to display as a grid.
- An AI-generated image: for a tutorial, ask the model to arrange the steps into one sheet. Open the CVY.AI image generator, choose a model with text rendering such as GPT Image 2, and select a 3:4 ratio. A square 1:1 canvas also works for a WeChat photo grid.
Here is the prompt used for the tomato-and-egg cooking example. Replace the recipe with your own topic:
Create nine images with the same aspect ratio, arranged as a 3×3 grid
with solid black divider lines, for a Xiaohongshu tutorial.
Panel 1 is the title: A beginner's guide to tomato and scrambled eggs.
Panels 2–9 show the recipe step by step. Each step must clearly explain
the key points, including ingredients, cooking time and heat level.
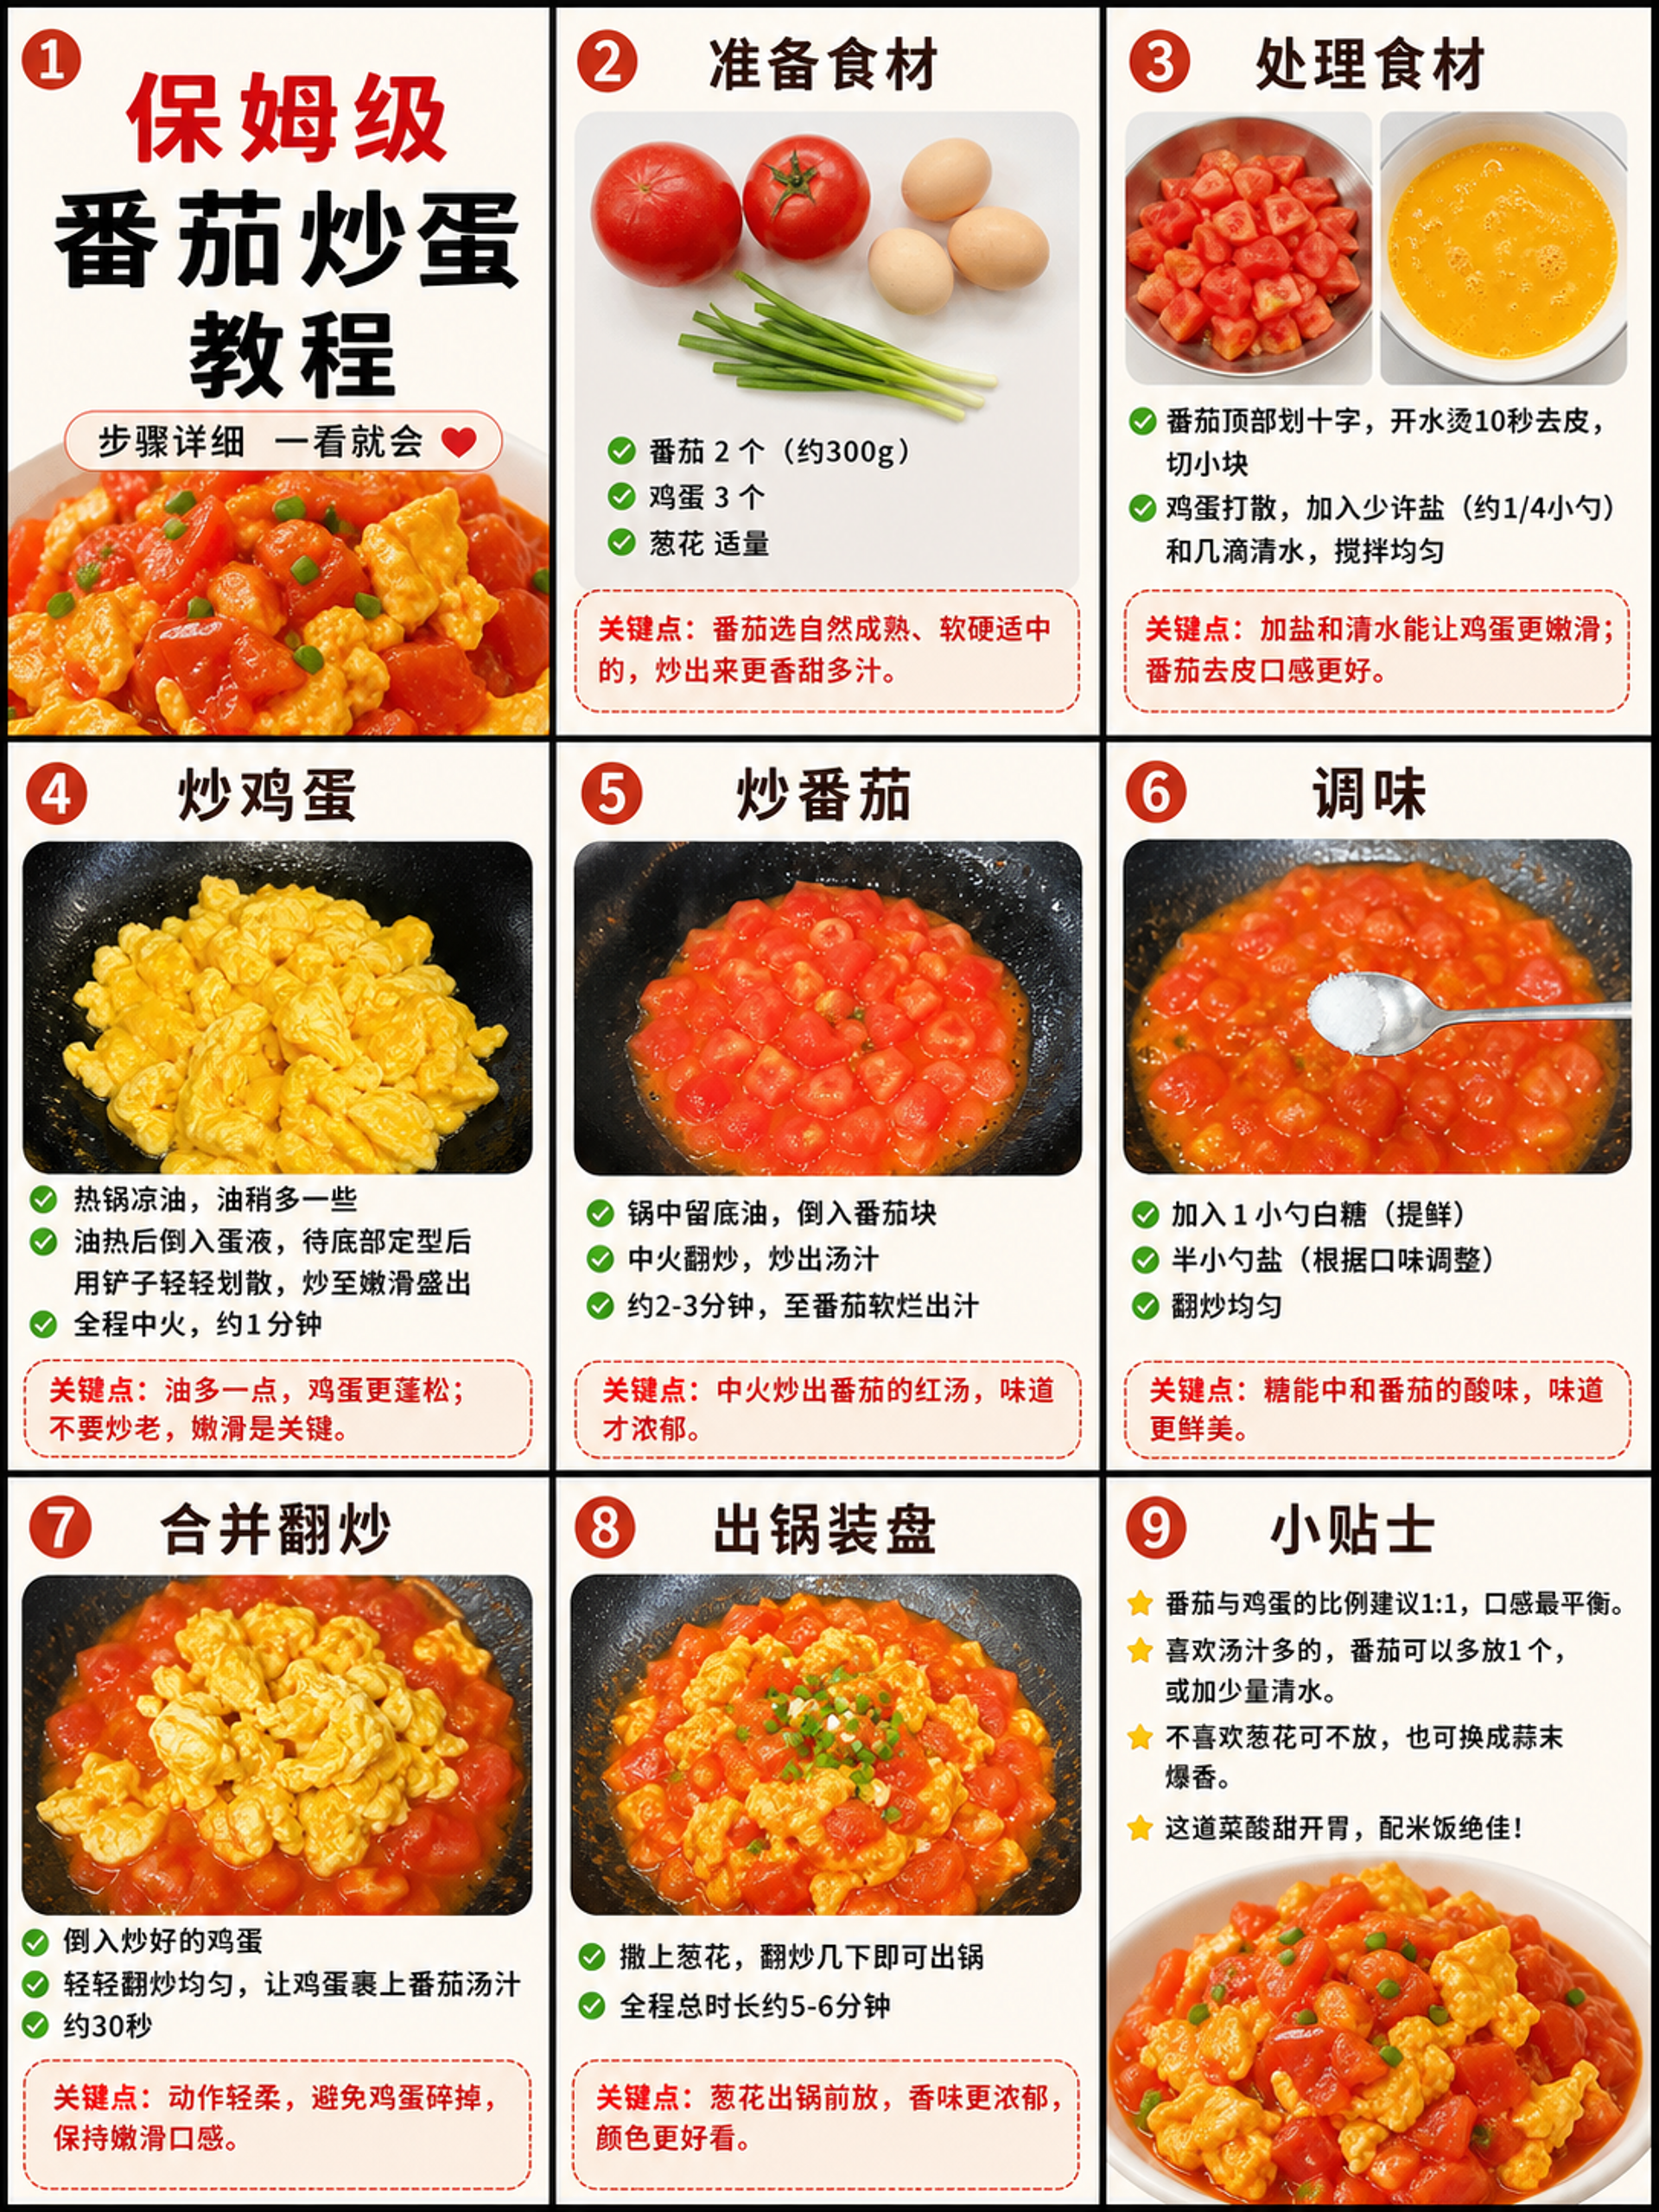
The result is one large 3×3 image, containing the title panel and eight instruction panels separated by divider lines. The original Chinese-language example is shown below.
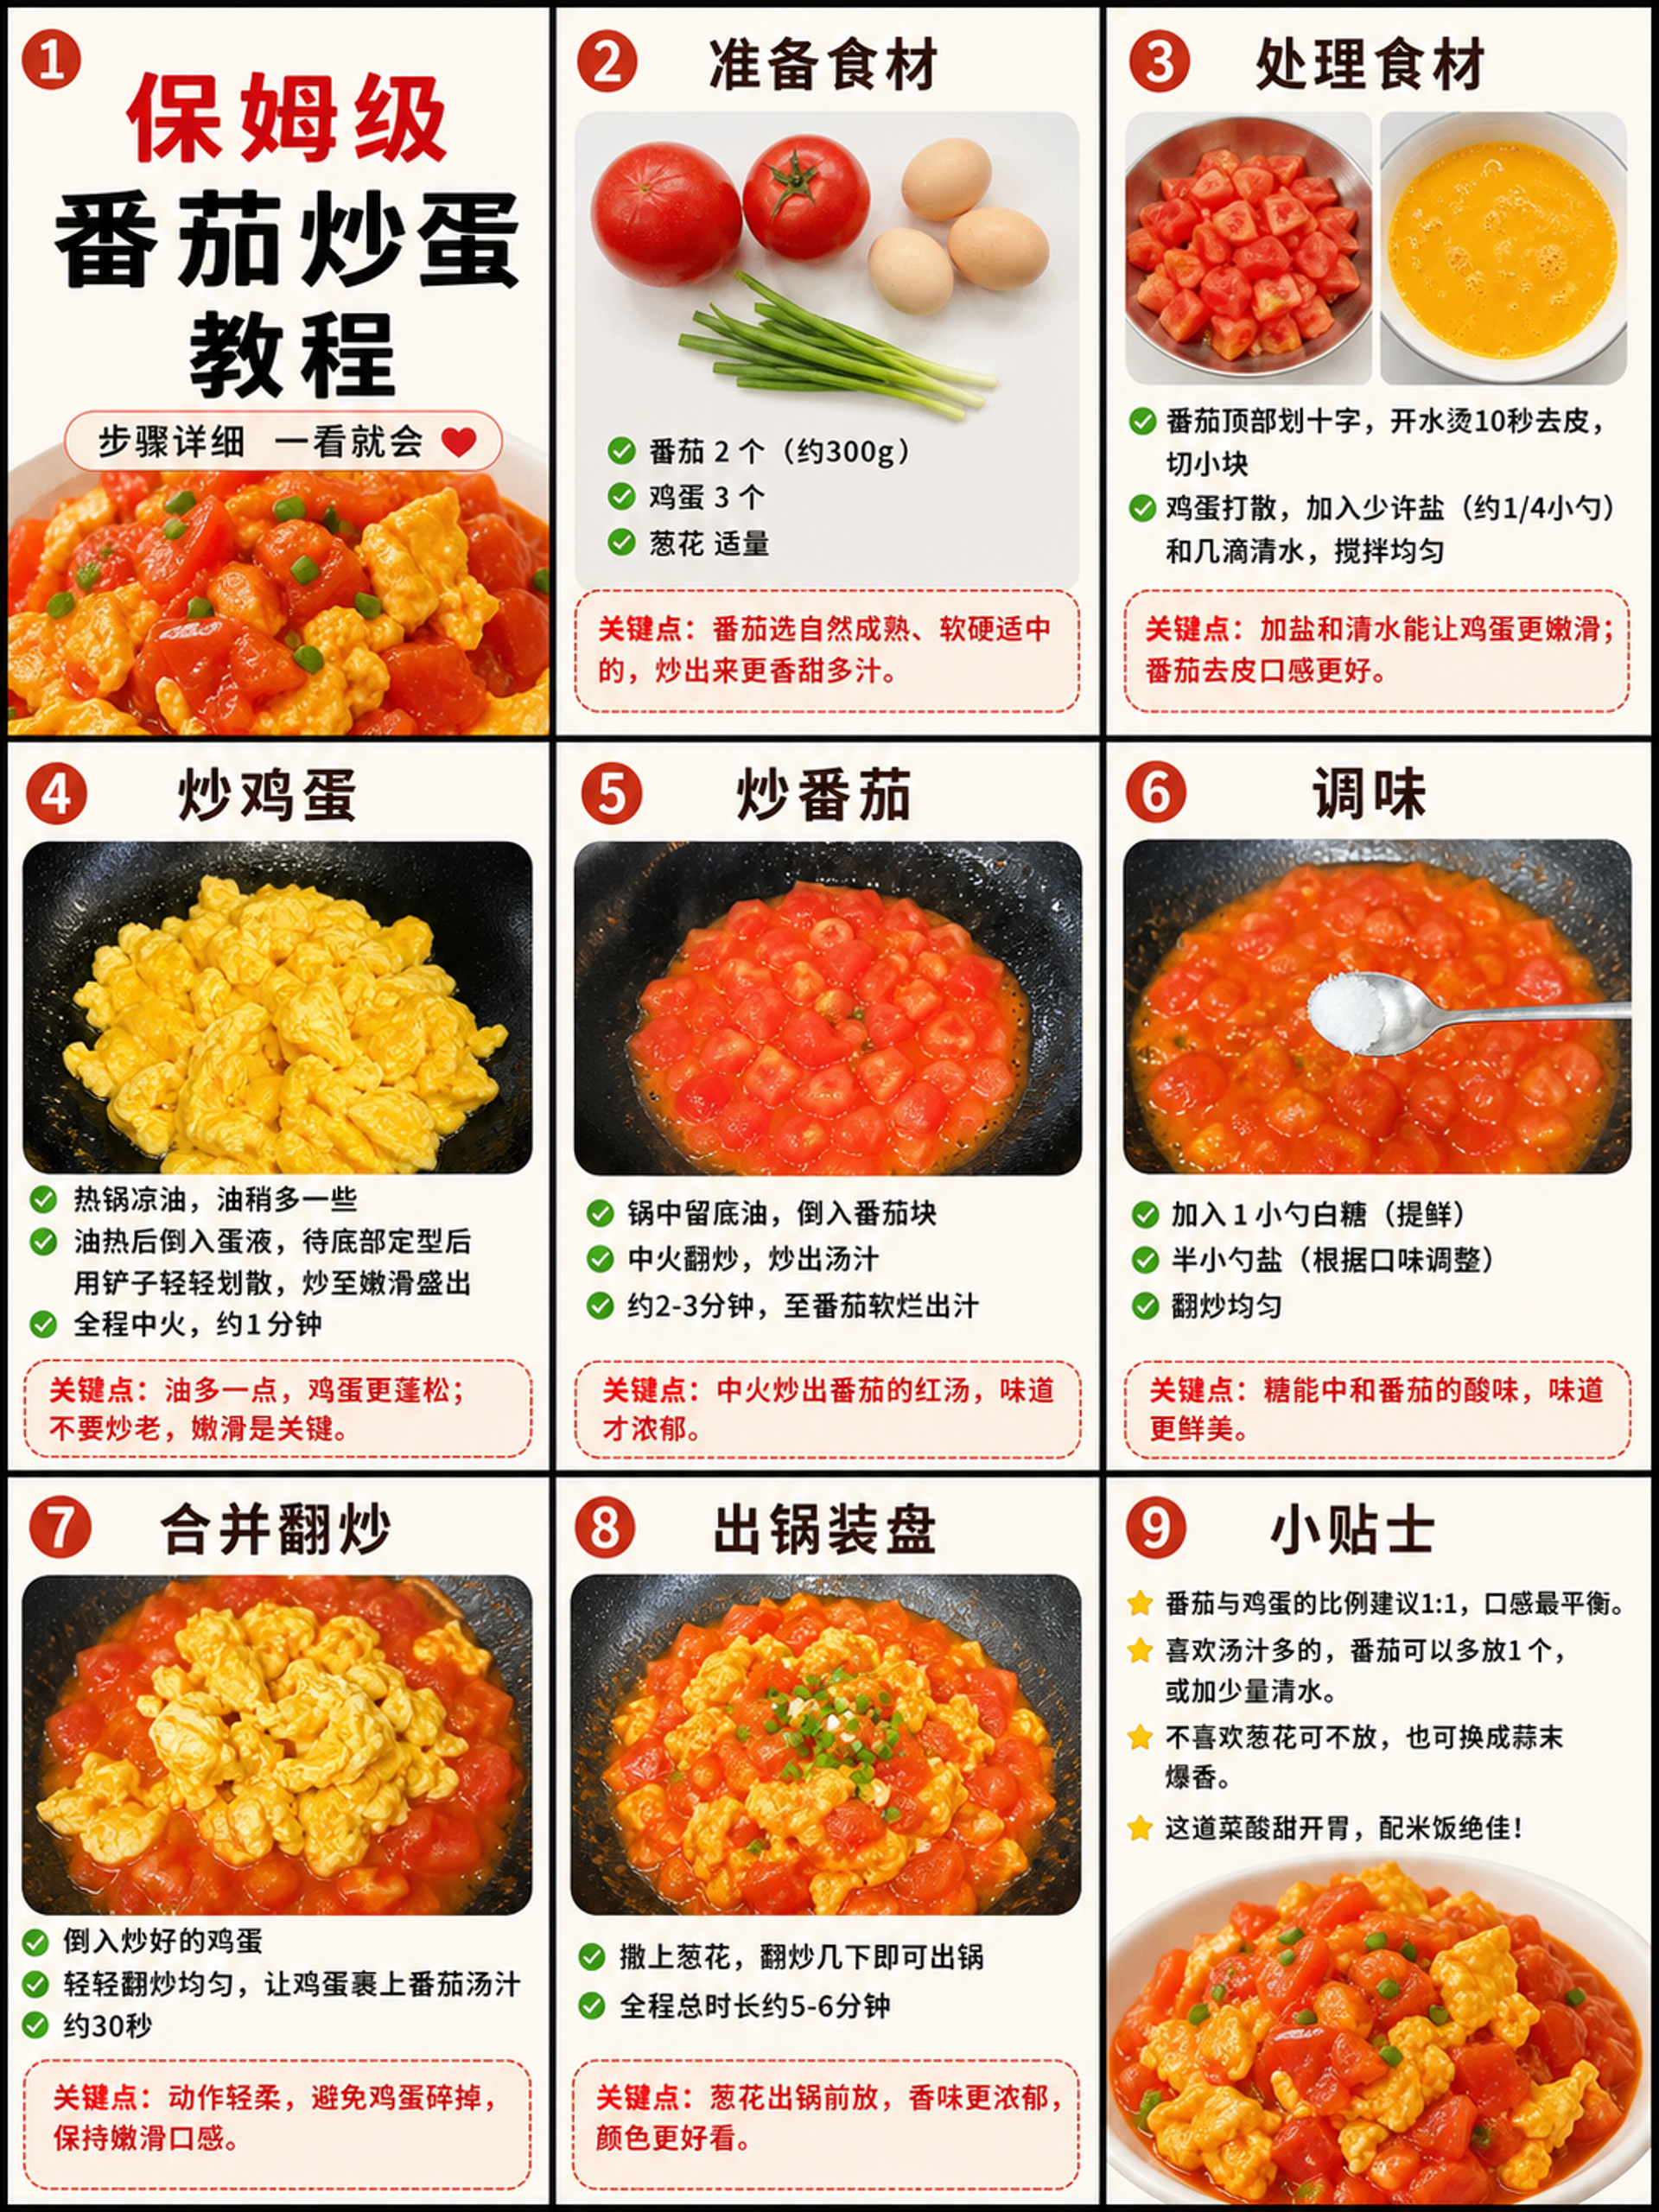
You can also open the original example and choose Use this prompt to load it into the generator. Text-to-image has a trial you can use without signing in.
Step 2: split it into nine images
Open the Image Splitter and drag in the large image. It detects divider lines, cuts along them and removes the lines themselves.
AI-generated panels are often slightly different sizes. Simply dividing the width and height by three can cut through text or illustrations. The splitter looks for the actual divider positions instead. It can detect black, white and colored dividers when their color is sufficiently consistent along the line.
If your source is a regular photo with no divider lines, switch to Manual N×M and set three rows and three columns.
The preview numbers the tiles from 1 to 9. Check the cuts, then choose Download all (ZIP) to save the set together. You can also download an individual tile.
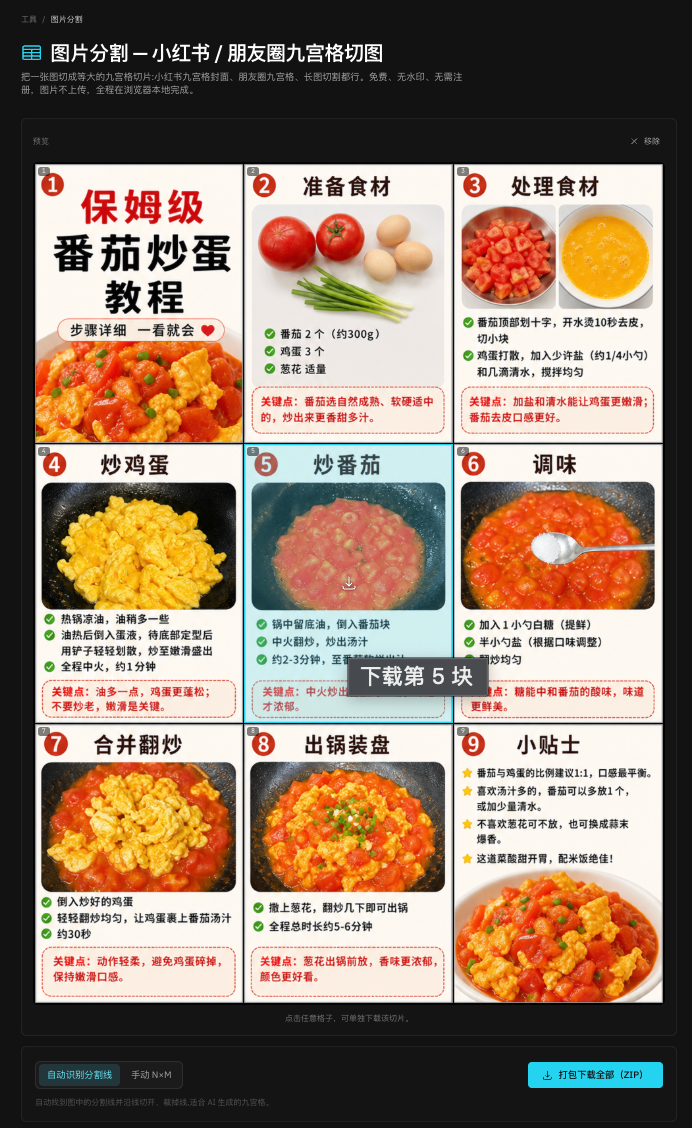
Splitting takes place locally in your browser. Images stay on your device; the tool adds no watermark and requires no registration.
Step 3: publish in order
Arrange the tiles from left to right, then top to bottom.
- WeChat Moments: upload the nine tiles in that order so the 3×3 display reconstructs the large image.
- Xiaohongshu: create a multi-image post. Upload the complete sheet first, followed by the nine individual panels. Detailed steps and checklists become easier to read when readers can open each panel separately.
Need to combine images instead?
If you already have several smaller photos and want one grid cover, use the Photo Collage tool.
Frequently asked questions
Which divider colors work?
Black, white and colored lines can be detected when the color is consistent along the line. For images without dividers, use the manual row-and-column setting.
Does the splitter add a watermark or require an account?
The splitter is free to use without registration, processes images locally and exports them without a watermark.
How many tiles should I make?
A nine-tile 3×3 layout is common for WeChat Moments. Four or six tiles can also work. For a Xiaohongshu tutorial, choose three to nine panels according to the amount of content.
Will splitting make the image blurry?
The tool crops from the original image at its original resolution. Each tile keeps the source pixels within its boundaries.
Can I use it on a phone?
Yes. Open the tool in your mobile browser.
How divider detection works
For the implementation, read Detecting Image Grid Lines: Split an AI Collage into Nine Tiles.
Original publication
Translated from the author's CNBlogs tutorial.
- Nine-grid image
- Image splitter
- Xiaohongshu
Put your next idea into a picture.
Open the image generator with your own prompt, or choose an example to start exploring.
Open image generator